Wednesday, July 20, 2011

Day 8 - Oreo Cupcakes


Hey Guys. Long time no see, eh?
So, while we still have the rest of our summer to enjoy, why not..make cupcakes?
Infact, why not combine milk's favorite cookie and make Oreo Cupcakes?
I hope you enjoy my re-blog of this funky twist on a cupcake.
--------------------------------------------------------------
Cupcakes 

3 ounces bittersweet chocolate, finely chopped
1/3 cup Dutch-processed cocoa
3/4 cup hot, strong-brewed coffee
3/4 cup bread flour
3/4 cup granulated sugar
1/2 teaspoon table salt
1/2 teaspoon baking soda
6 tablespoons vegetable oil
2 large eggs
2 teaspoons white vinegar
1 teaspoon vanilla extract
15 Oreo halves, with cream filling attached


Frosting 

1 3/4 cups plus 2 tablespoons whipping cream
3 tablespoons powdered sugar
1/2 teaspoon vanilla extract
6 tablespoons Oreo cookies, finely crushed
15 Oreos for the top of each cupcake

------------------------------------------------------------------
 Preheat oven to 350°F and line a muffin pan with cupcake liners.
 Twist Oreos in half and set aside the extra cookies for later.
Place the side with cream filling in the bottom of each cupcake liner, cream-side facing up.
Place chocolate and cocoa in a medium bowl and pour the hot coffee over the mixture. Whisk until smooth and transfer to the refrigerator to cool completely, 20-30 minutes.

Whisk flour, sugar, salt, and baking soda together in a medium bowl; set aside. 

Whisk oil, eggs, vanilla, and vinegar into the cooled chocolate mixture until smooth. Add flour mixture and whisk until batter is smooth.

Divide batter evenly among muffin pan cups, filling each 3/4 full. Bake until cupcakes are set and firm to the touch, 17-20 minutes.

Allow to cool in pans 10 minutes, then transfer to a wire rack to cool completely before frosting. 

For the frosting, in the bowl of an electric mixer fitted with the whisk attachment, combine the whipping cream, powdered sugar, and vanilla extract. Beat on medium-high speed until the whipped cream holds stiff peaks. Gently fold in the cooke crumbs with a spatula.

Scoop the mixture into a pastry bag and pipe on top of the cupcakes (you can also use a ziplock bag and cut one of the corners to use as a pastry bag). Garnish with Oreo cookies.
---------------------------------------
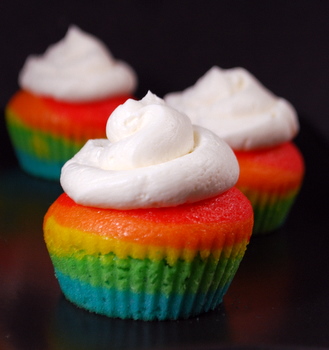
Recipe and Image courtesy goes to http://buddingbaketress.blogspot.com/

Friday, April 1, 2011

Day 7 - Newspaper Giftwrap

Recycled and Good Looking.....?

Sure is! This easy to do craft is a great recycling project, while still keeping your gifts safe and stylishly wrapped. Obviously, all you really need is some newspaper, tape, and maybe a ribbon for some flare. And dont stop and boxes and gifts ; this same method works GREAT for wine or those hard to wrap bottles. Just roll up in the paper and tie with a ribbon at the top for a cute and simple gift!

-----------------------------------------------------------------------------------------------------------

Tuesday, March 29, 2011

Day 5 - Buttercream Icing


Well this is sort of an addition to my rainbow cupcakes recipe...cause seriously....whats a cupcake with out some ICING? Any who here's the recipe I have been using in the past!
---------------------------------------------------------------------------------------------------------

Ingredients-
  • 1/2 cup of solid shortening
  • 1/2 cup or 1 stick of softened butter of margarine
  • 1 tsp vanilla extract
  • 4 cups sifted powdered sugar
  • 2 tablespoons milk

    Directions -
    • In a large bowl, cream the softened butter and shortening with a hand mixer
    • Add Vanilla
    • Gradually pour in the powdered sugar (1/2 - 1 cup at a time)
    • Once well mixed, add in the milk until light and fluffy
    • Cover with a wet washcloth until ready to use
    ---------------------------------------------------------------------------------------------------------

    Note - Before milk is added, the icing will look dry and hard
    Note - For spreadable icing -- add 2 tablespoons  corn syrup
    Note - Keep refrigerated in an airtight container for up to 2 weeks
    Note - Re whip when reusing
    --------------------------------------------------------------------------------------------------------
    Recipe Copyright to Me
    Image Copyright to TipDeck

    Monday, March 28, 2011

    Day 3 - Mug Cozy


    A cute and "cozy" mug warmer, perfect for one of those frosty days! Crocheted obviously and definitely a project added to my q once I get enough time to go out and buy some more yarn -- happy crafting
    ------------------------------------------------------------------------------------------------------------

    Image Copyright to - Finvara @ Deviantart

    Day 2 - Rainbow Cupcakes


    Introducing one of the most long awaited recipe requests I have gotten in a while. These delectable, cute, small, and utterly colorful cupcakes are sure to make a great treat. I hope you enjoy and I apologize in advance for the humongous post this is going to be :)

    -----------------------------------------------------------------------------------------------

    Ingredients --
    • 1 Box of White Cake Mix
    • 3 eggs
    • 1/4 vegetable oil
    • 1 cup water
    • Assortment of Gel Food Coloring (in all colors)
    • Homemade icing (optional)

    Directions --
    • Preheat your oven to the needed temperature ; 375
    • In a large bowl prepare the cake mix as stated on the box
    • Gather together 6 bowls, 6 spoons(one for each color), and your food coloring
    • Evenly distribute the cake batter amongst the 6 bowls using a measuring cup or spoon
    • In each bowl squeeze an equal amount of food coloring (one color per bowl)
    • For the orange: mix 3 drops yellow with 1 drop red
    • For the purple: mix 3 drops blue and 2 drops red
    • Stir each bowl until all the bowls are the desired color
    • In a lined muffin pan spoon in the colors in backwards order of the rainbow
    • purple, blue, green, yellow, orange, red ; forming layers of color
    • Bake as stated on the box
    • Let cool and top with homemade icing (optional)
    -------------------------------------------------------------------------------------------------

    Note - for petite cupcakes use a mini muffin pan and smaller amount of batter
    Note - Use caution when mixing the purple ; it can get very yucky
    Note - FEEL FREE to make your own batter -- i was just being lazy
    Note - Although gel food coloring works the best; liquid is fine too
    Note- Don't forget to cut it open and see the rainbow!

    -------------------------------------------------------------------------------------------------
    Recipe copyright to me
    Image copyright to BakingBites

    Day 1 - Pop Tab Bracelets


    I recently found this on the web and thought it was a just such a creative idea. Recycling our everyday pop tabs into functional and colorful pieces of jewlery. This is a perfect craft for ....well anyone really... especially those crafty at heart types of people!


    Step 1 - Gather 8-10 STANDARD pop tabs (depends on the size you need)

    Step 2 - Find a coloful/printed ribbon you will use for the "bracelet"

    Step 3 - Using one pop tab weave the ribbon through the two wholes (like shown)

    Step 4 - Repeat this weaving step until you have the desired length

    Step 5 - Using a paperclip or safetypin, bend it around the bracelet ends until connected

    Step 6 - OR tie the ribbon in a bow OR add a small bead to the end of the ribbon

    -------------------------------------------------------------------------------------------------
    Note- Colored pop tabs make this craft even better!

    Note - Make sure the pop tabs are clean and facing smooth side out

    Note - There are endless ways to make these ; so get creative and experiment

    -------------------------------------------------------------------------------------------------